- Español
- Português
- русский
- Français
- 日本語
- Deutsch
- tiếng Việt
- Italiano
- Nederlands
- ภาษาไทย
- Polski
- 한국어
- Svenska
- magyar
- Malay
- বাংলা ভাষার
- Dansk
- Suomi
- हिन्दी
- Pilipino
- Türkçe
- Gaeilge
- العربية
- Indonesia
- Norsk
- تمل
- český
- ελληνικά
- український
- Javanese
- فارسی
- தமிழ்
- తెలుగు
- नेपाली
- Burmese
- български
- ລາວ
- Latine
- Қазақша
- Euskal
- Azərbaycan
- Slovenský jazyk
- Македонски
- Lietuvos
- Eesti Keel
- Română
- Slovenski
- मराठी
- Srpski језик


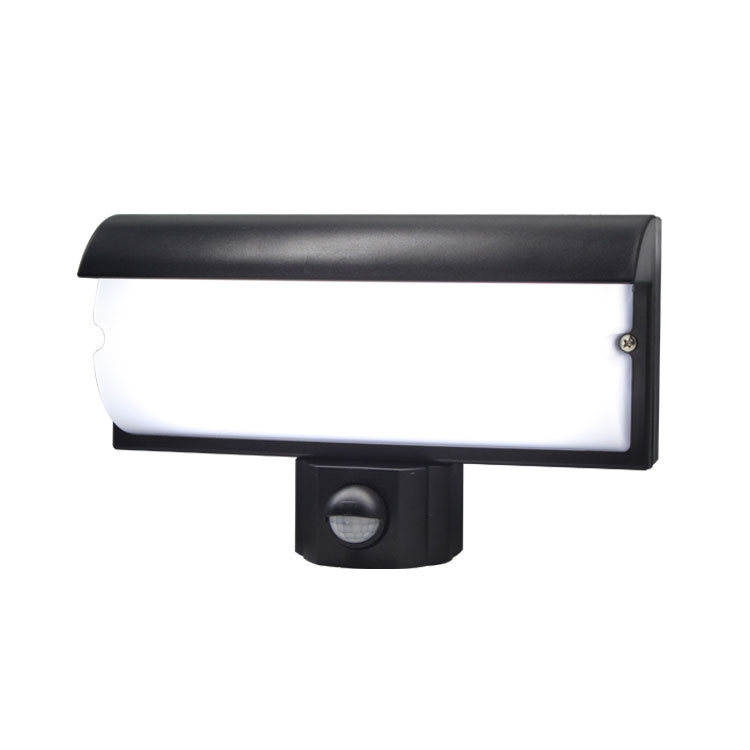

Infrared Sensor Lamp
As the professional manufacture, we would like to provide you Infrared Sensor Lamp. And we will offer you the best after-sale service and timely delivery.
Send Inquiry
Product Description
PD-PIR2015 Infrared Sensor Lamp Instruction
Summary
 |
LED as a mordern light source has become the development trend in the lighting industry with the characteristics of high efficiency, long life expectancy and relatively low energy consumption.How to use it reasonably and efficiency is the key issue in the lighting industry.PD-PIR2015 are designed with 30 LEDS(0.45W).Its reasonable layout makes heat flow even and achieve the most optimized lluminous efficiency. And a 6W LED lamp can generate almost the same brightness when compared to using a 65W resistor type Incandescent Lamp.Its life time is 100 times longer than ordinary halogen lamps.It can work with human sensor switch which makes it more energy saving and secure with the light turning on when one comes in and turning off when one goes out.LED lamps are an ideal light turning on when one comes in and turning off when one goes out.They are also an ideal substitute as an energy saving light source. |
Specifications
|
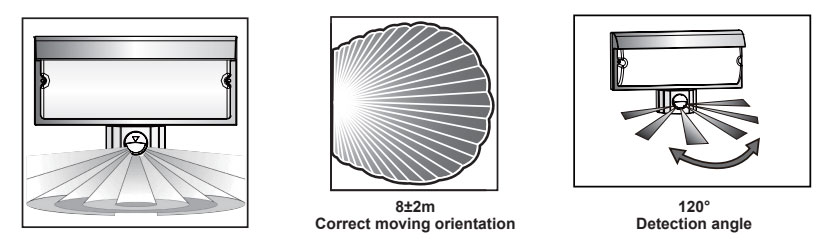
Power source: 220-240VAC 100-130VAC Power frequency: 50/60Hz Detection range: 8±2m Max(22°C) Detection angle: 120° Time setting: min:7sec±3sec max:6min±2min(adjustable) Light-control: <5LUX~2000LUX(adjustable) |
LED quentity: 30PCS Standby power: 0.45W LED specifications: T5050
Rated load: 6W Max.
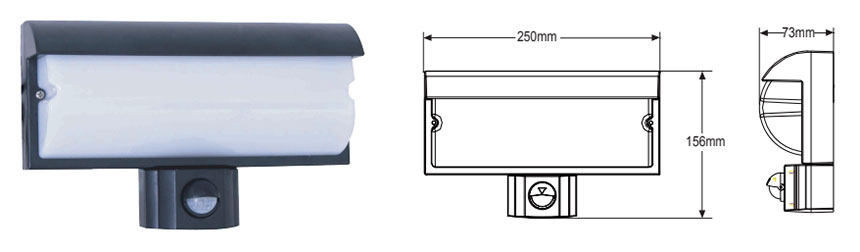
Installation height: 1.5m~3m(wall installation) |
Sensor information
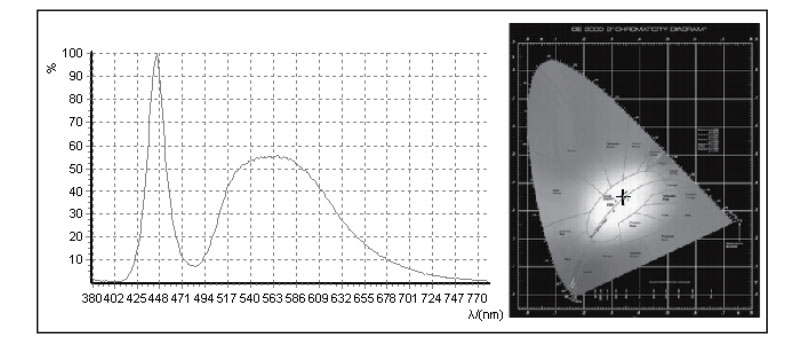
Spectrogram
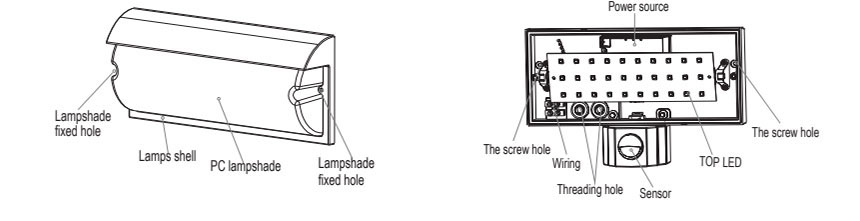
The names of each part
(LAMP SHELL FOR ALUMINUM MATERIAL)
Installation
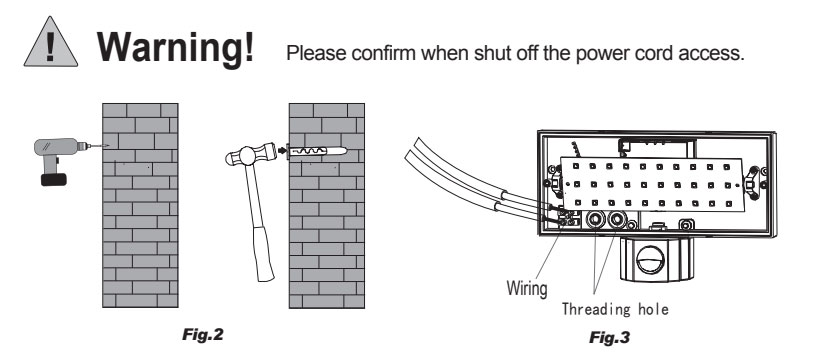
Note:Please bring the following tools

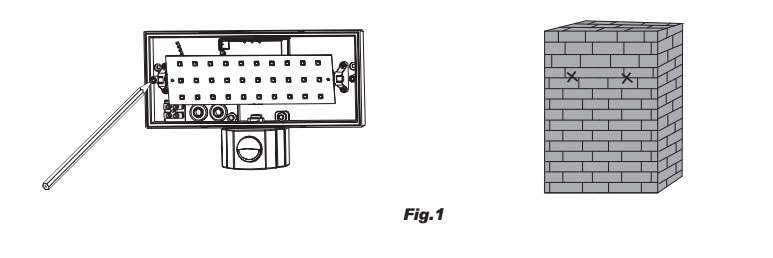
Step1 Mark the hole position with a pencil after determining where you want to install the product.(as Fig.1)
Note:If it is a wooden wall,there is no need to use plastic expansion screw,just fasten the screw with the screwdriver.
Step2 Drill holes on the walls where there is pencil mark with an electric drill and get the plastic expansion inside the hole.(as Fig.2)
Step3 Connect the cable to the lamp through the cable entry openings(as Fig.3)
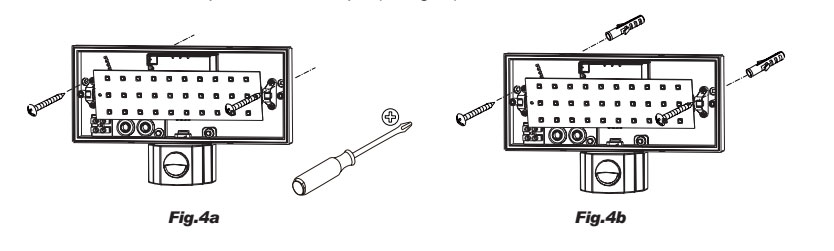
Step4 If it is a wooden wall,there is no need to use plastic expansion ,just drive the screw with the screwdriver.(Fig.4a)
If it is not a wooden wall,please refer to step 2.(as Fig.4b)
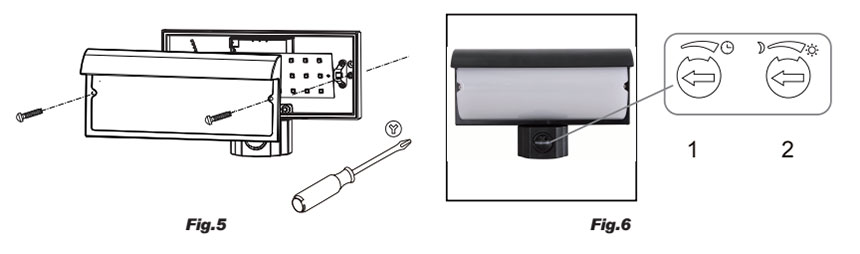
Step5 Fasten the cover to the lamp base which has been installed on the wall.(Fig.5)
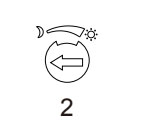
Step6 Open the cover of the control panel downwards,and set the control knobs,and then the control panel upwareds.(as Fig.6)
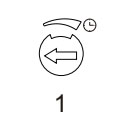 |
It can be set at the range of 4 second (counterclockwise rotation to the end) to 8minute(clockwise rotation to the end) .The timer will recount when the sensor detect a moving signal before the end of the last time, so we advise that you’d better set the time to minimum when you make the detection range testing or the walking testing. |
Note: The sensor need to wait 1secend to re-work after the light going off. Only after the end of the time, the light will lighten again when detecting the signal.
 |
Work illumination value can be adjusted in the range of 5 ~ 2000LUX illumination value is about 5LUX when counterclockwise rotation to the end, illumination value is about 2000LUX when clockwise rotation to the end. The knob should be rotated counterclockwise to the end when making the walking test or adjusting the detection range during the day. |
Note: Do not force too much when adjusting the three knobs because they are assembled directly on the component! There is a small limiting device in the component, which will be broken if you force too when the knob is rotated to the end. If it happens, the knobs will be rotated 360° without the device limiting. Please notice that the limited adjusting angle of the knobs is 270°.
Fault and the solutions
| Fault | Failure cause | Solution |
| Does not work with the load | Light-illumination set incorrectly, the load is broken | Adjust the setting of the load |
| The power is off | Change the load | |
| There is a continuous signal in the region of the detection | Turn the power on | |
| Work all the time with the load | The sensor have not been installed correctly |
Check the settings of the detection area |
| Sensors failed to pack good cause its cannot reliably detect signal | Re-install the outer covering | |
| Work with the load | Moving signal is detected by the sensor (movement behind the wall, the movement of small objects, etc.) | Check the settings of the detection area |
| When there is a moving signal work with the load | The moving body is too fast or the detection area is too small | Check the settings of the detection area |

1.The LEDS in serial can function when all the seals installed in place.
2.Please don’t remove or connect with other lamp when powered on.
3.When the LEDS in serial are damaged ,you need experienced technician to repair using the same rating LEDS.
The screws used on the light case are common ones when sent out from the factory.The specific Y type stainless screws in the plastic bag for screws are used for fixing the lampshade after the technician has finished the installation.It is for protecting aganist the electric shock.
● Please confirm with prefessional installation.
● Please cut off power supply before installation and removal operations.
● Make sure that you have cut off the power for safety purposes.
● Improper operation caused losses, the manufacturer does not undertake any responsibility.
We are committed to promoting the product quality and reliability, however, all the electronic components have certain probabilities to become ineffective, which will cause some troubles.When designing, we have paid attention to redundant designs and adopted safety quota to avoid any troubles.
This instruction, without our permission, should not be copied for any other purposes.